OpenSignTool Tutorial
This article walks through steps of using OpenSignTool to create a speed limit sign. We will have a general idea on how OpenSignTool works.
Sign Specification
In order to create a standard sign, the first step is to find sign dimensions. MUTCD website has two Standard Highway Signs and Markings (commonly known as “sign books”) books published on this web page.
https://mutcd.fhwa.dot.gov/ser-shs_millennium.htm
The 2004 version is on the left hand side. When you click the book cover, you will find links to a series of PDF files. The second book is 2012 supplement version, and it is contained in one PDF file. Those two books have sign overlaps. When a sign appears on both books, we should choose the latest version in the 2012 supplement. Click the 2012 book cover to open the PDF file. Page 22 (PDF page) shows R2-1 Speed Limit sign specification.
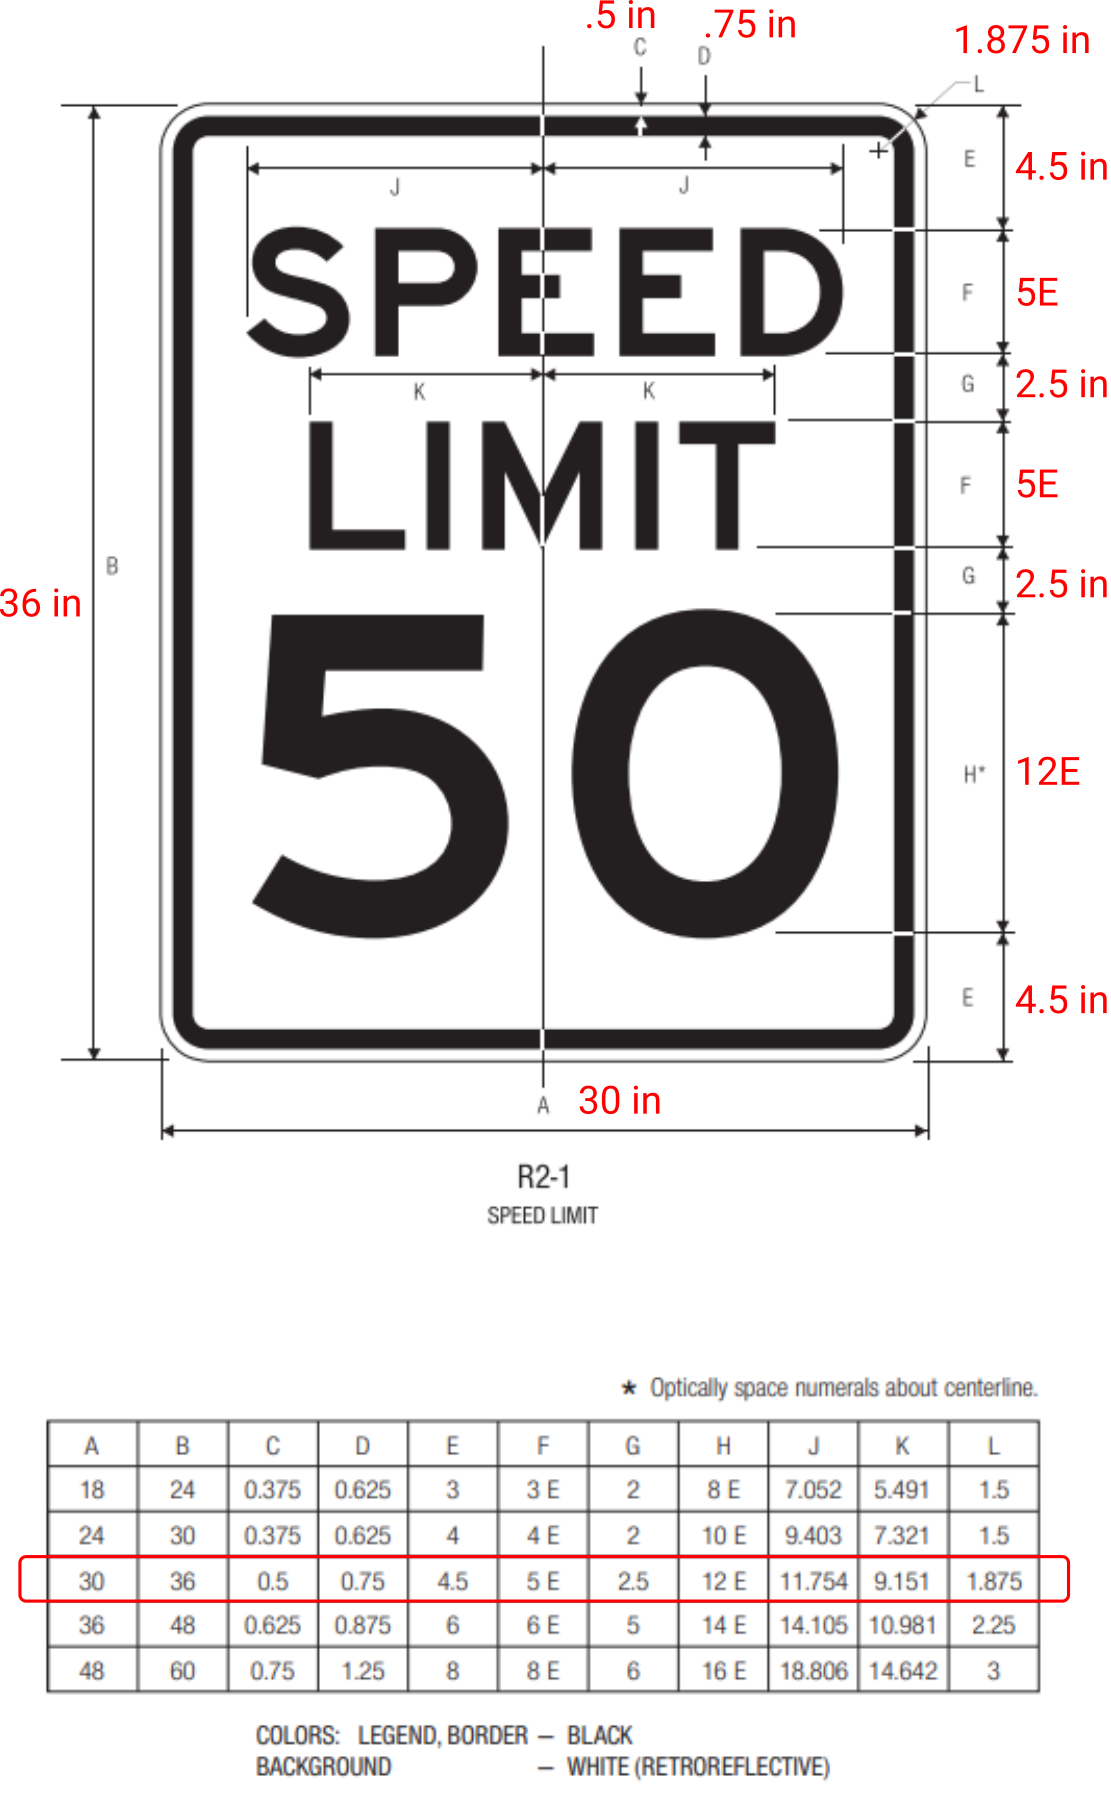
There are 5 rows on the table representing 5 different sign sizes. Let’s create the one in the middle which is 30 x 36 inch size. The image above also shows other dimensions listed on the table. The letter size “5E” means that the message is 5 inch tall and sign font size is “E”.
Sign Border
Let’s open Inkscape and start working on the border. It is better to start from a new file when we design signs in Inkscape.
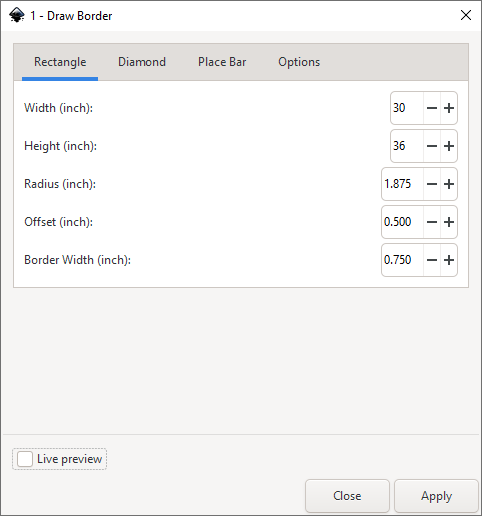
Click menu Extensions -> OpenSignTool -> 1. Draw Border and the tool dialog will show up. Enter those values on the default Rectangle tab and click Apply button. The tool will change size of the Inkscape canvas and draw three border lines.
Now click the menu View -> Zoom -> Zoom Page (Shortcut: 5 key on keyboard). Inkscape will show the full drawing page.
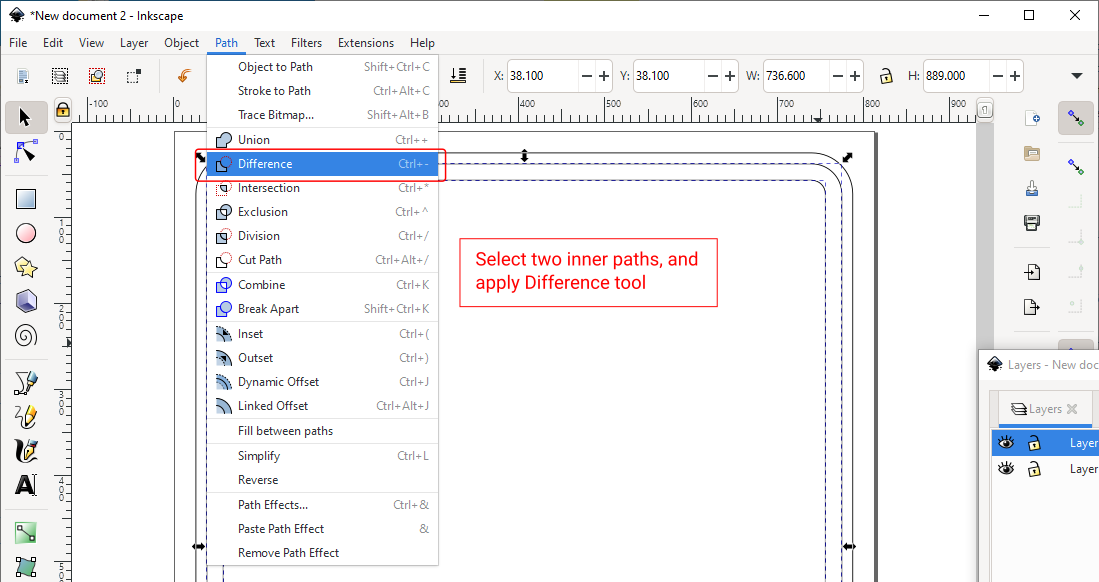
Select the two inner border lines (Shift + Click), and click menu Path -> Difference. This tool combine two paths to become one path (see screenshot below).
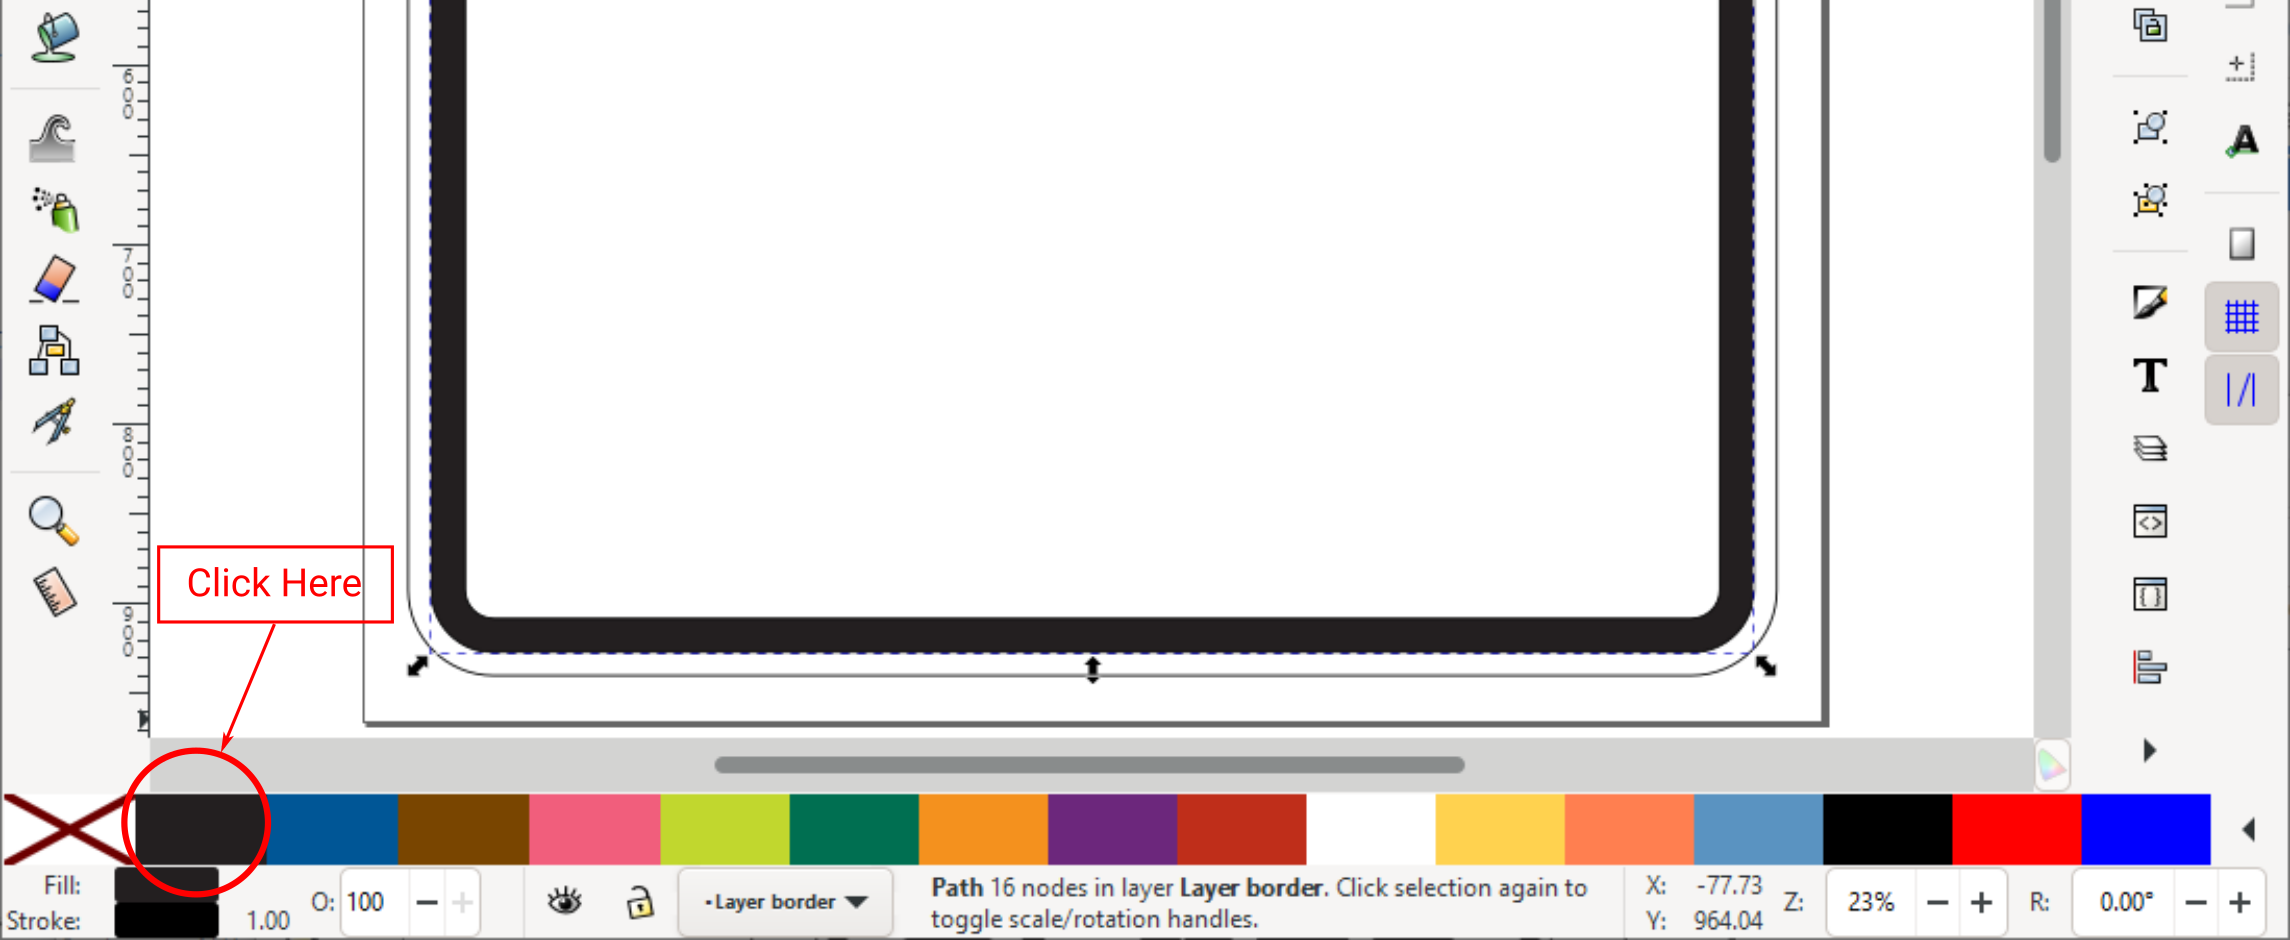
We can fill the inside of the new path to “sign black” color by clicking the first color on the color palette. Now we finish the border part of the sign. You can fill the outer border path with white color, but often it is not necessary.
Alignment Lines
The next step is to place alignment lines on the page. Click the menu Extensions -> OpenSignTool -> 2. Place Alignment Lines. Enter those numbers on the dialog.
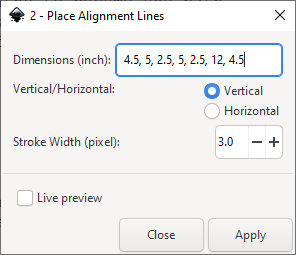
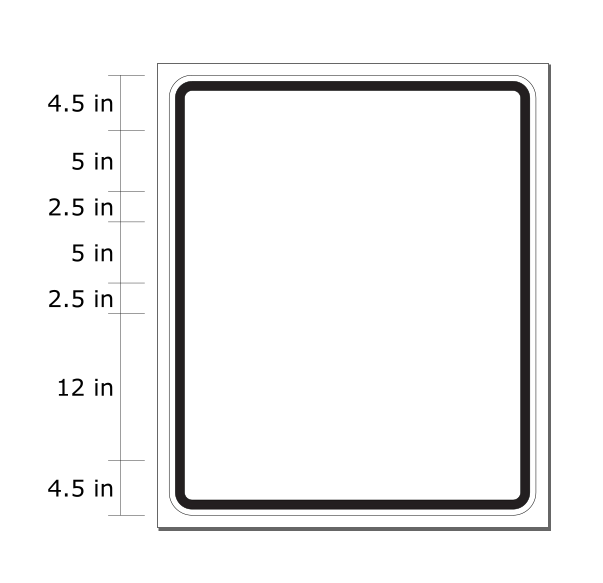
Click the Apply button and the tool will place a series of lines on the left hand side of the drawing. Those lines will help place other messages on the sign. The tool can also place horizontal alignment lines if needed. After placing the vertical alignment lines, the Inkscape canvas looks like this.
Place Sign Messages
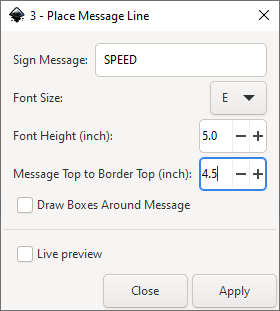
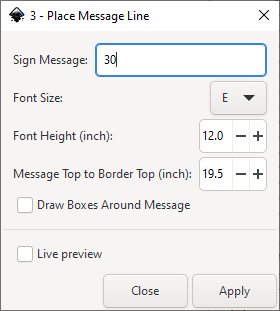
We will place three sign messages on the sign. The first one is “SPEED” on the top line. Click the menu Extensions -> OpenSignTool -> 3. Place Message Line, and enter those values on the dialog. This tool automatically places the message on the center of the sign.
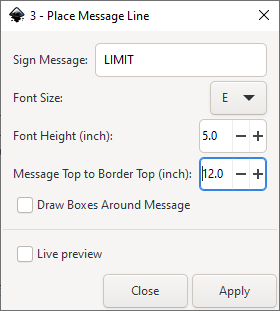
The next message is “LIMIT” on the second line. Enter those values on the same dialog and click Apply. The value “Message Top to Border Top (inch)” value 12 is the sum of 4.5, 5, and 2.5.
The last message is “50” on the last line. The numbers on the dialog are shown below. If a wrong number is entered and a message is placed, we can click menu Edit -> Undo to undo the step. We can also use the Alignment and Distribute Inkscape tool (Shortcut: Ctrl + Shift + a) to manually adjust the message location on the sign.
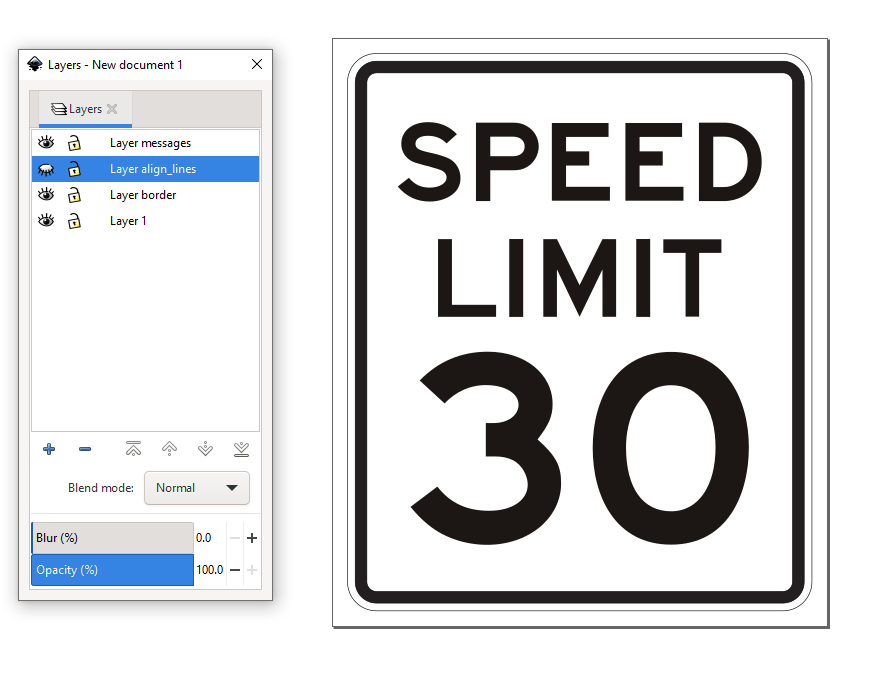
Now you have a speed limit sign in Inkscape. The elements on the sign are saved under different layers. You can turn of the “Layer align_lines” layer or delete alignment lines. Inkscape supports lots of file format, and you can save the file to different formats through menu File -> Save As.
Summary
The OpenSignTool consists of several Inkscape extension programs which are used to design traffic signs. The above steps show how to use three tools Draw Border, Place Alignment Lines, and Place Message Line. We will explain the other two tools in later articles.