Draw Interstate Sign In Inkscape
This article describes the process to draw an interstate sign in Inkscape. It discusses some useful Inkscape techniques for drawing traffic signs. Those techniques are also applicable when you are drawing other signs.
Get Started
The 2004 Standard Highway Signs (sign book) Guide Sign document Page 1 shows the details of interstate shield sign. The table shows that it has three height sizes 24, 36, and 48 inches. The two digit and three digit signs have different shield shape. Obviously, three digit signs are wider.
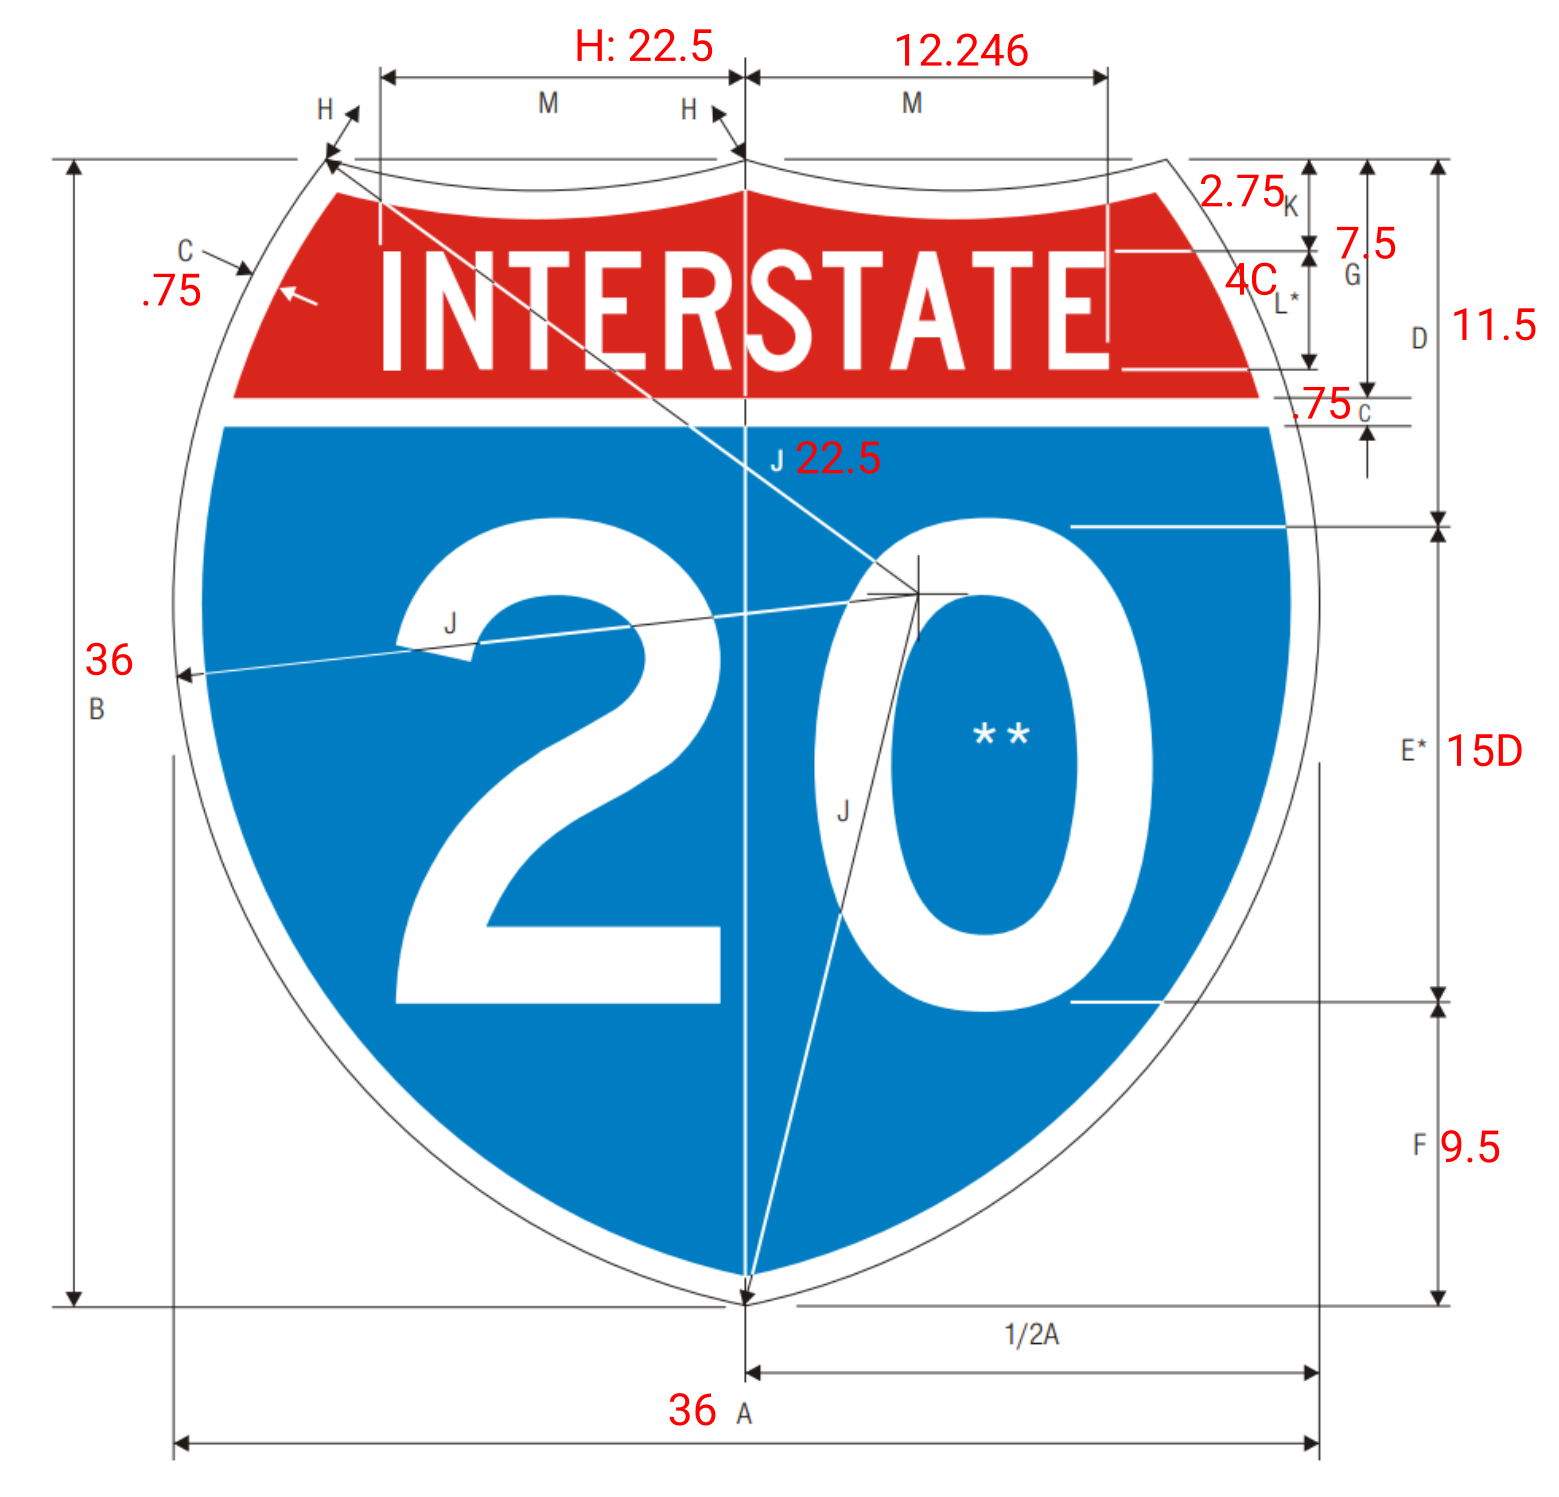
Let’s look at the second row and draw a 36” x 36” one or two digit sign. After reading this article, you can try to draw the three digit 45” x 36” sign as an exercise. The figure below shows the M1-1 sign with dimensions marked on the drawing.
Setup Drawing In Inkscape
In this example, we will use the Draw Border Tool to setup the drawing page. Click on the menu Extensions -> OpenSignTool -> 1 - Draw Border and enter those numbers on the dialog. The radius and offset values do not matter for this example.
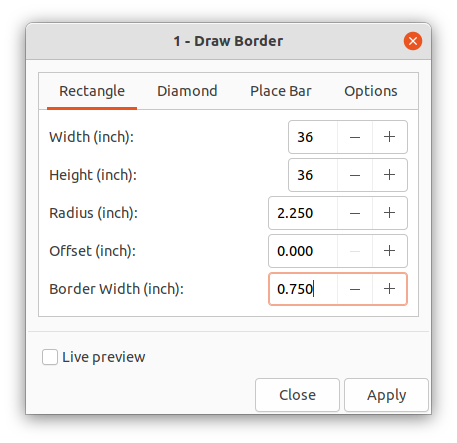
The Draw Border extension will resize the drawing size to 38” x 38” which includes 1 inch margins on each side.
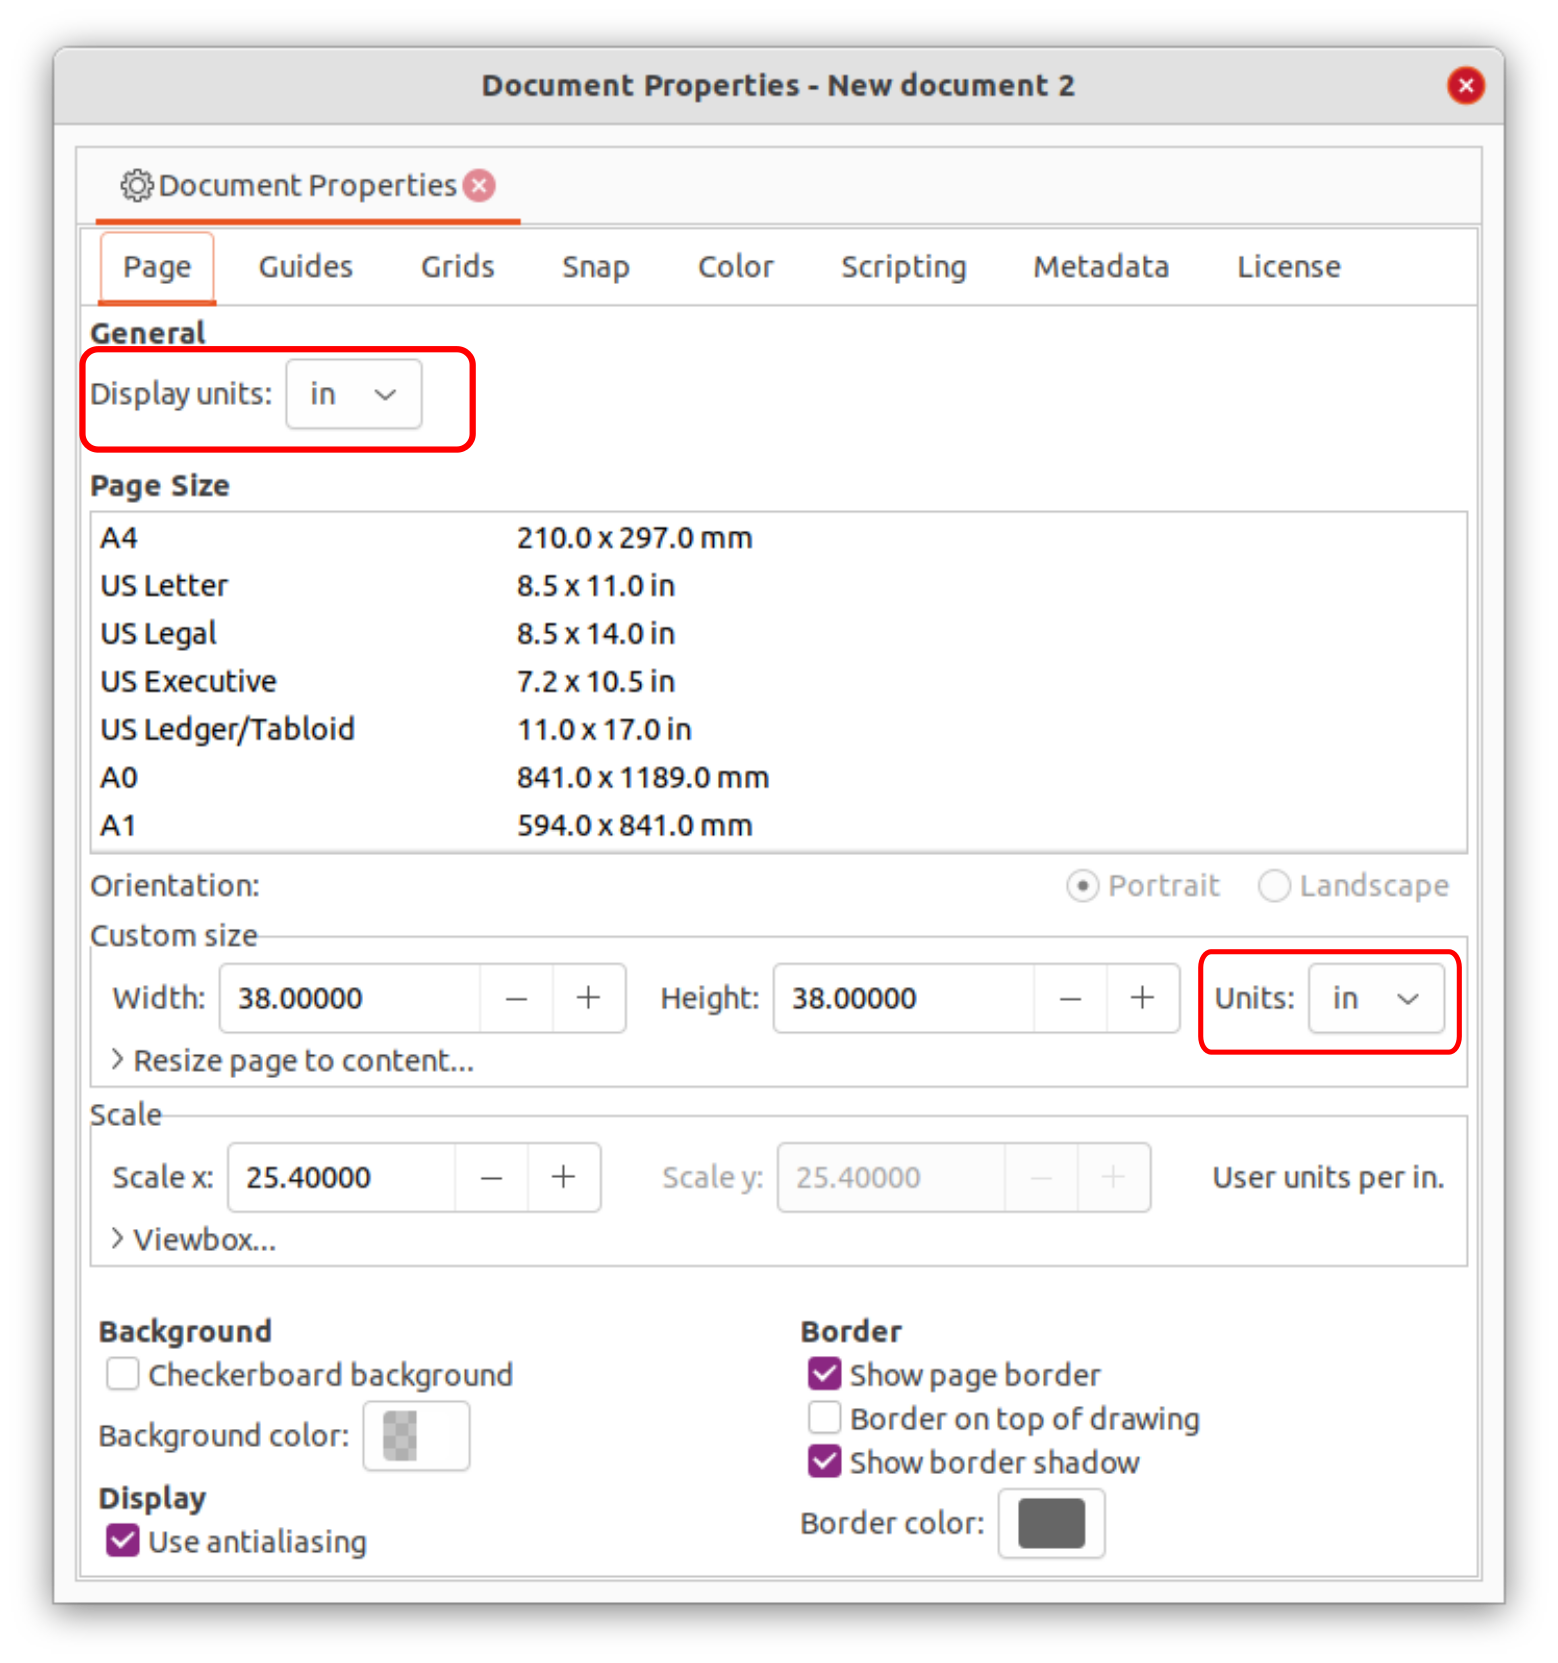
Next step we will set the drawing units to inch. Click the menu File -> Document Properties and change both “Display units” and “Custom size units” settings to inch.
Draw Top Curve
Toggle Snapping button and middle point button on the snapping bar which is on the right hand side of the page. Use the Bezier tool (shortcut: b) to draw a vertical center line. This is an auxillary line to help locate other drawing elements.

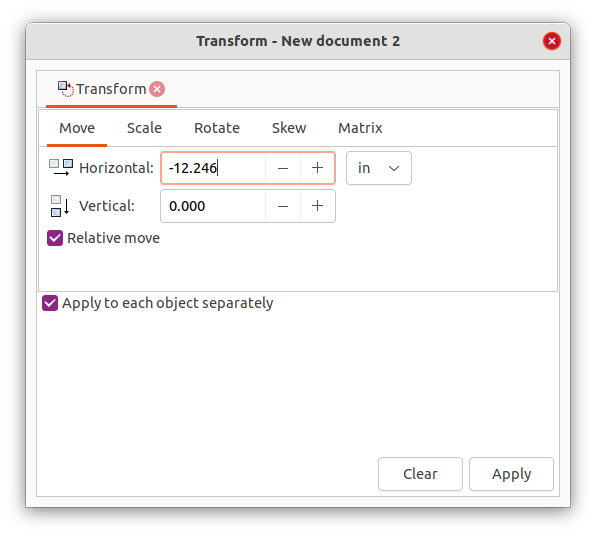
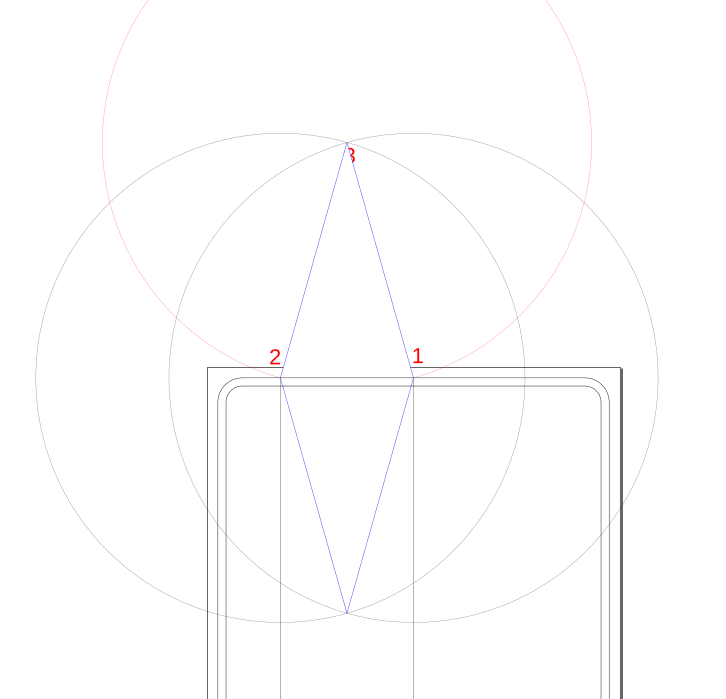
Select the vertical center line, click “Ctrl + d” to make a copy of the line. Then use the Transform tool (Ctrl + Shift + m) to move the copied line 12.246 inch left. Now we have two end points of the top curve (Points 1 and 2 on above figure).The curve has a radius of 22.5 inch (H value).
Now draw a 22.5 radius circle with point 1 as center point. Click the circle tool on the toolbar, hold down Ctrl and Shift keys, and start drag out a circle. Double click the circle, and set the Rx and Ry values to 22.5 in on the top tool bar. Next draw a second 22.5 inch radius circle with point 2 as center point. The two circles intersect at Point 3. Use point 3 as center point and draw a third circle with radius 22.5 inch. We can delete the first two circles. The remaining circle has a radius 22.5 inch and passes through points 1 and 2.

The arc between points 1 and 2 is the curve we want for the sign. We only want the arc and need to delete the rest of the circle. On the same layer we draw a polygon (Bezier tool, blue element) that covers the arc. Select both the circle and the polygon, and apply menu Path -> Intersection. The result is the intersection part of the circle and rectangle.
Select the element, and choose “Edit path by nodes” tool (shortcut: F2) on the toolbar (second from top). Select nodes 1 and 2, and apply “Break path at selected node” tool on the node toolbar on the top. After this, apply Path -> Break Apart menu to the element. The tool will break the path into two paths. We can delete the top path. What is left is the arc we need for the drawing.

The purpose of the above steps is to draw an arc. The arc has a known radius and it passes through two points. Many CAD programs have a tool to draw that. Inkscape does not have this tool built in. We could write an extension to do that, or just use the existing tool and have a few more steps to achieve the same result.
Draw Side Curve
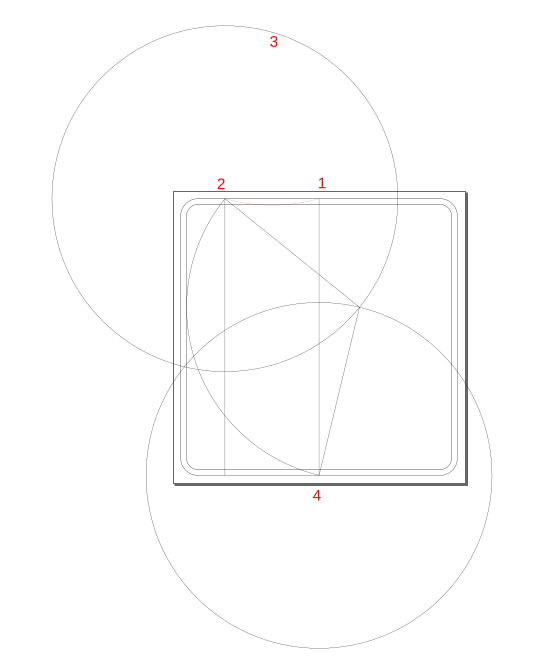
The exact same technique can be used to draw the side curve. Draw two circles with points 2 and 4 as centers, and draw a third circle with the intersecting point as center.
Outer Path
We have two paths on the drawing. The top path from point 2 to 1, and a second path from point 2 to 4. In this step, we can combine those two paths into one.
Select both paths (Shift + select), and click the “Edit path by Nodes” tool on toolbar. Hold down the Shift key, and select node 2. This will select both end nodes on two paths. Click the “join selected nodes” tool on Node toolbar. Then apply menu Path -> Combine, and this will make the two paths into one path.

Make a copy of the new path (Ctrl + D), and apply menu Object -> Flip Horizontal (Shortcut: h). Move the path to align with point 1.
For nodes at points 1 and 4, use the same above steps to join them and combine the two paths into one. We will have one path which is sign outer edge.

Inner Path
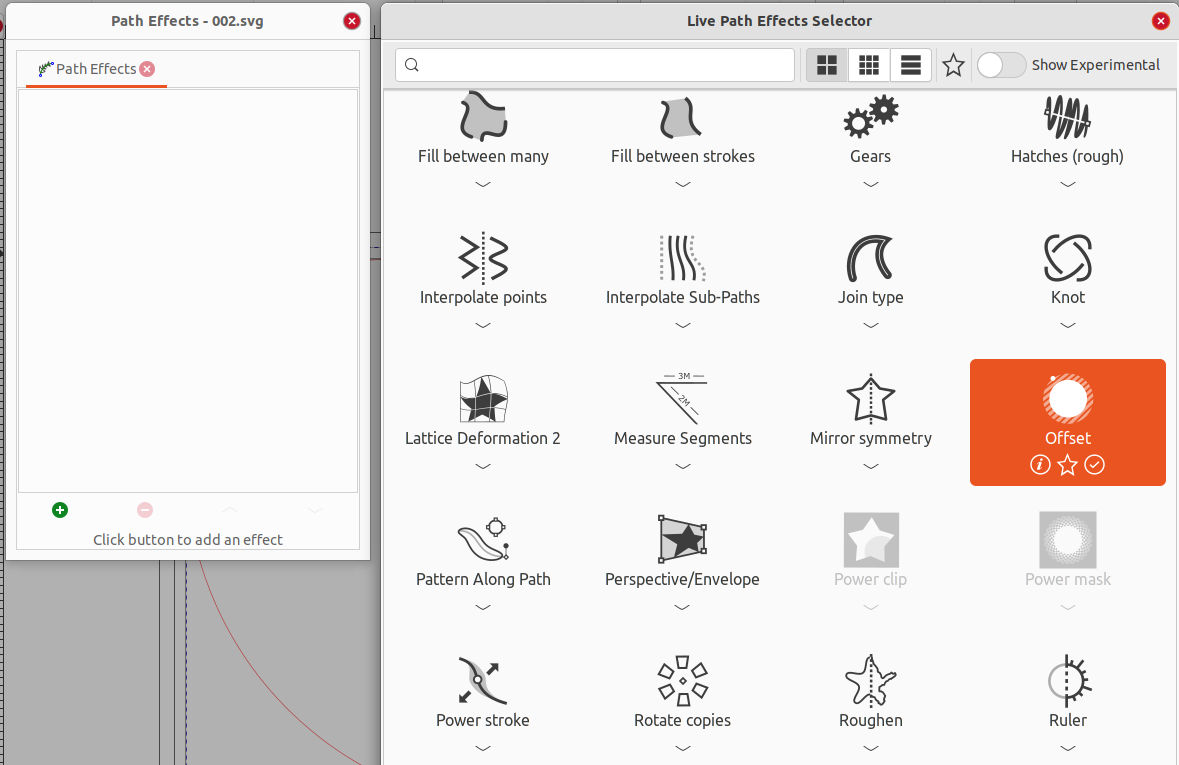
The inner path has the same shape as the outer path. It is offset 0.75 inch inward from the edge. Inkscape has a tool for this operation. Make a copy of the outer path and select it, apply menu Path -> Path Effects. On the popup dialog, select the “+” button on the bottom. Select “Offset” effect on the second dialog.
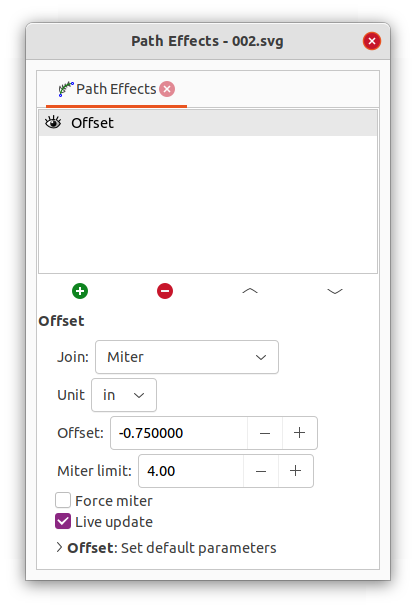
Back to the first dialog, select the “Offset” effect and enter those values. We do not need to change “Join” type and “Miter limit” for this example, and leave them with default values.
After those steps, apply menu Path -> Object to Path and the inner path is finished.
Top Interstate Part
Draw a horizontal line aligned with top edge, and move (Ctrl + Shift + m) it 7.5 inch down the drawing. Make another copy of the line and move it down 0.75 inch. Make a copy of the inner path (Ctrl + d). This is for the next step.
With the top line selected, choose the “Edit path by Nodes” tool, and choose the Bezier tool (b). Start from one point of the line, and draw a polygon which covers top part of the the inner path and end it at the second point of the line. Now select the inner path and the new polygon, and apply Path -> Intersection tool and we get the top part of the shield.

Bottom Number Part
The same exact procedure can be applied to get the bottom number part. After we get the two paths, remove the stroke color and fill the top part with “Sign Red” color and bottom part with “Sign Blue” color. Fill the outer path with “Sign White” color. We will get a nice shield without messages.

Add Messages
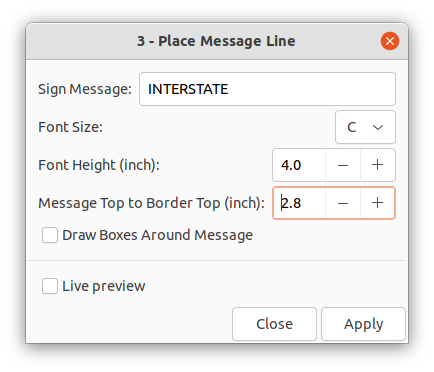
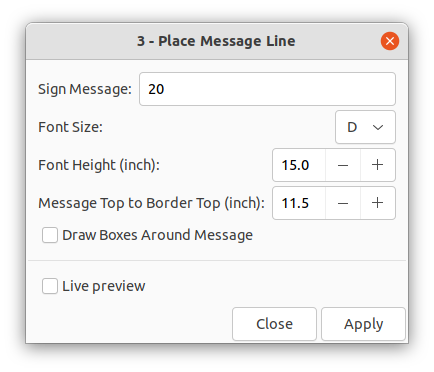
The last step is to add “INTERSTATE” and route number messages to the sign. Click the Extensions -> OpenSignTool -> 3 - Place Message Line twice to add two messages. The tool will automatically place black messages on the drawing. Move the “INTERSTATE” message 0.05 inch upward to achieve accurate result. Change the fill color to “Sign White” after placing them.
After those steps, we will have a nice interstate shield sign in Inkscape.

Summary
The steps to draw an interstate shield sign in Inkscape is a little tedious. Once you become familiar with Inkscape and OpenSignTool, it takes about 10 minutes from start to finish. The same techniques described in this article will help draw other traffic signs.
This article discusses useful Inkscape techniques for traffic sign design. If you simply want an interstate shield sign drawing, you can check out the Interstate Route Sign app and download a copy of the sign.