Draw Border Tool
This article discusses the “Draw Border” tool of OpenSignTool package.
Sign Borders
MUTCD Section 2A.14 has three paragraphs discussing sign borders (copied below).
- Unless otherwise provided, each sign illustrated in this Manual shall have a border of the same color as the legend, at or just inside the edge.
- The corners of all sign borders shall be rounded, except for STOP signs.
- A dark border on a light background should be set in from the edge, while a light border on a dark background should extend to the edge of the sign. A border for 30-inch signs with a light background should be from 1/2 to 3/4 inch in width, 1/2 inch from the edge. For similar signs with a light border, a width of 1 inch should be used. For other sizes, the border width should be of similar proportions, but should not exceed the stroke-width of the major lettering of the sign. On signs exceeding 72 x 120 inches in size, the border should be 2 inches wide, or on larger signs, 3 inches wide. Except for STOP signs and as otherwise provided in Section 2E.16, the corners of the sign should be rounded to a radius that is concentric with that of the border.
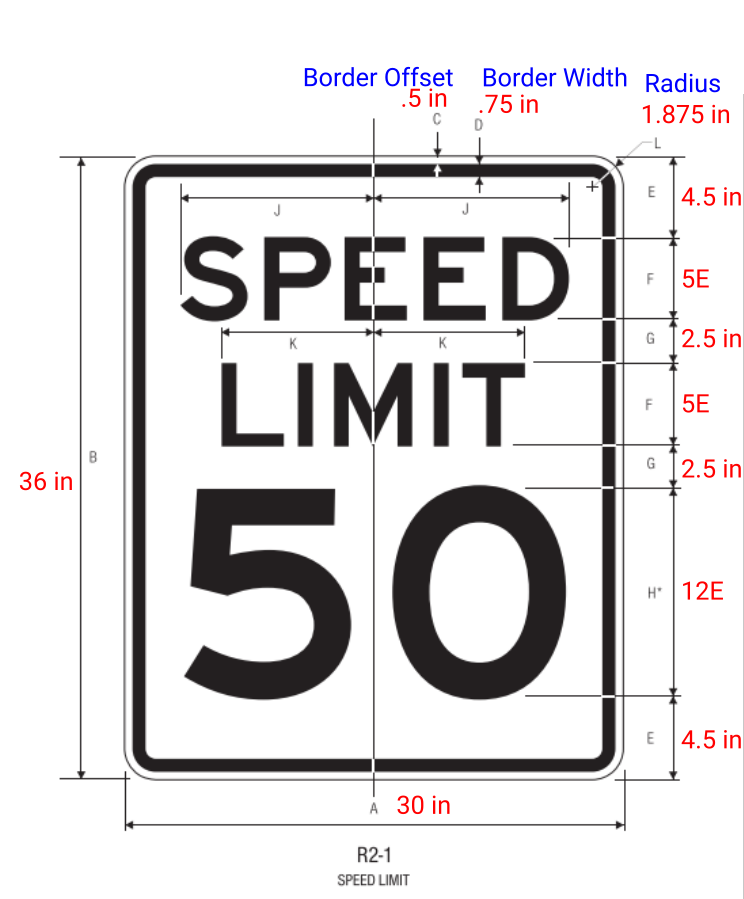
We often refer to “a dark border on a light background” as positive contrast sign. For example, speed limit sign R2-1 has a black border and message on a white background. The “a light border on a dark background” is often called negative contrast sign. An example is a white on green guide sign. The negative signs do not have an offset (see below figure).
Border Terminologies
The two figures below shows some common sign border terminologies like offset, border width, and radius. The speed limit sign is a positive sign with a border offset (C) of 0.5 inch. The border width (D) is 0.75 inch, and the radius (L) is 1.875 inch.
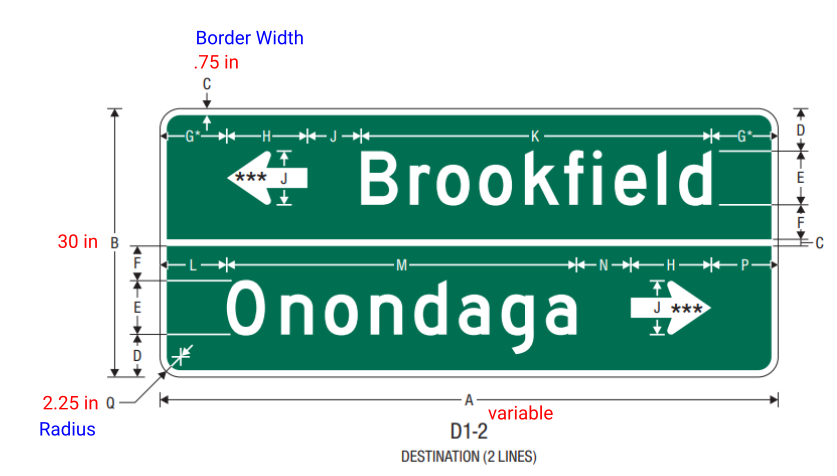
The D1-2 sign on Page 244 of the 2012 Sign Book (shown below) is a negative sign. It does not have a border offset. The border width (C) is 0.75 in, and the radius is 2.25 in.
Draw Border Tool
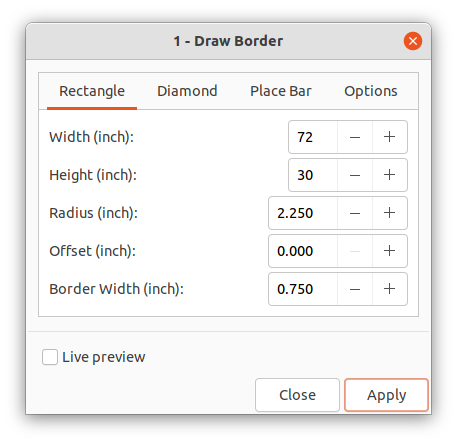
The Draw Border Tool dialog has 4 tabs on the top (Rectangle, Diamond, Place Bar, and Options). The OpenSignTool Tutorial article explains the Rectangle tab. When we are drawing a negative sign, we simply set the “Offset” value to 0. The values on the figure below will draw the D1-2 sign border. The width value 72 in is an estimate. The sign design process is iterative. If we find the width value is too big or too small, we will adjust the value later.
The below figure show the Draw Border Tool result. The inner path is filled with the Sign Green color.

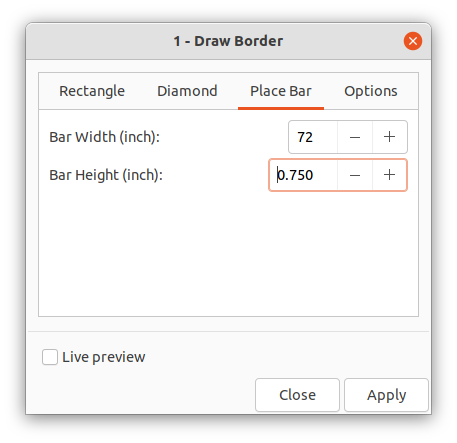
The Place Bar tool is normally used to place the center horizontal bar between the two destination messages. For this example, we will draw a bar with 72 in width and 0.75 height (the same as border width). The Place Bar tool will place a rectangle bar in the center of the canvas.
Next step is to select the inner sign background and this bar rectangle. Click the menu Path -> Difference to cut the bar off the green background. After this step the result look like the below figure.

Diamond Border
The Diamond tab is mainly for black on fluorescent yellow warning signs or orange construction diamond shape signs. The Speed Hump sign W17-1 on Page 233 is an example.
Let’s create the 36” x 36” W17-1 sign border with the tool. Enter the values shown below on the Diamond tab.
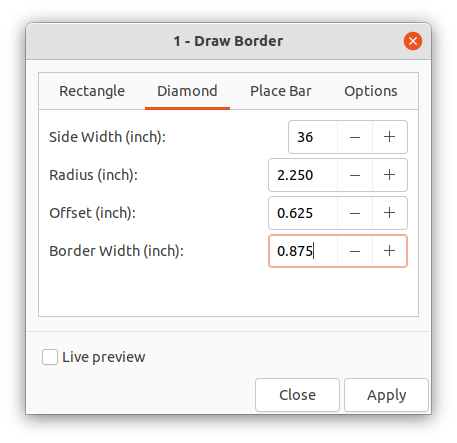
The tool will draw three diamond border paths on the canvas. Apply menu Path -> Difference to the two inner paths and fill the result with black color. Also fill the outer path with fluorescent yellow or orange color. The result look like the figure shown below.

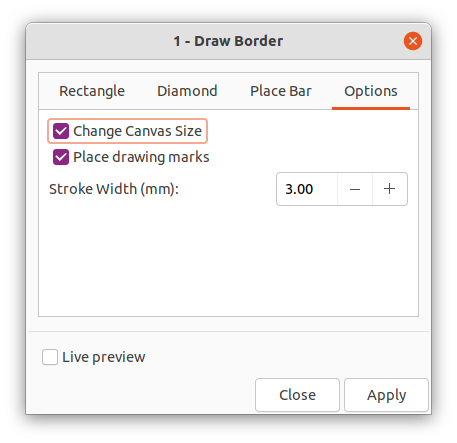
For this example, I also toggle the “Place Drawing Marks” option. The four border marks will be helpful when we start placing messages on the sign. By default, this option is not selected. The “Change Canvas Size” option is selected by default, and the “Stroke Width” is set as 3 mm. Normally we don’t need to change those two values.
Others
The sign border elements are not complicated graphic objects in Inkscape. We can use only Inkscape tools to create the border, but the Draw Border tool in OpenSignTool makes this process much faster and less error prone. The tool doesn’t try to do everything by itself. A sign designer still needs to make manual adjustment to paths. This is an intentional design choice to give sign designers more control.